A Footnote about Flooring
- REV.2 -
Wood flooring comes in all colors, lengths & sizes. It comes in a variety of widths and thicknesses, too. Just hope that the floor you bought doesn't. Now I would like to call this a review, but there are a few too many caveats that disqualify that (more on this later). By appearance alone, we were duly impressed with the Bellawood 5" Ash (select, pre-finished) that we acquired for a pleasing price. But as we got to installing it, we found a number of variances that should not be. Specifically:
- 1/16" (max) difference in width
- 1/16" (max) difference in thickness
- both ends not being parallel
I can only hope that this is not endemic in all wood flooring. We purchased our flooring as a quasi-odd lot. They claimed it was mostly due to being in the warehouse for so long, rather than for manufacture defects and therefore retains its 50 yr finish guarantee. This was the same floor we had wanted beforehand, type, size & grade, and it was all they had which was exactly 105% of what we needed. Happenstance, no? So until we actually purchase an "official" set, I will have to withhold my review in regards to their milling accuracies. For now, my rule of thumb is to avoid all gaps I can easily slide a folded sheet of (20 lb) paper into, or an empty envelope. This is what I have to do in each of the above cases to some degree for each board I put down.
 Now, variations in color and length are expected, even desirable. Having a board that is just "*" wider than its adjacent one will cause tremendous grief when the next row comes along. The same goes for boards that are wider at one end. What happens is that you will have a sizable gap between your floorboards, one that will welcome dirt, grit, hair, etc., and will stare back at you when you try to admire your otherwise beautiful floor. There are three solutions...well, four, but I don't like that fourth one. I am listing them is decending order of preference.
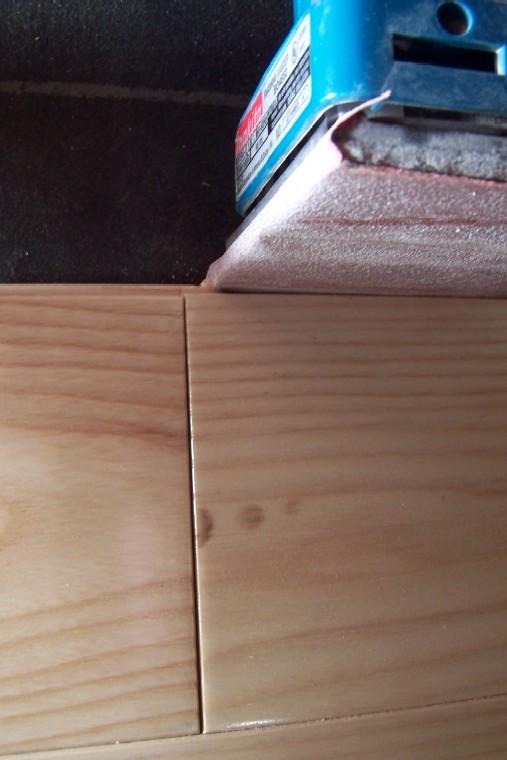
 (1) The first thing I try is to sand down the bump-out, assuming it is rather less than that 1/16". This bump-out is the result of boards that are not of uniform width, rather than mis-alignment. I use a palm sander on the face above the tongue of the piece stapled down, and on the lower lip of the groove on the piece about to be laid. You need to do this latter part or it wont slide in flush. (2) If it is nearer to that 1/32" difference, I will shape only the board about to be put down. This may involve extensive sanding, but I am not so good
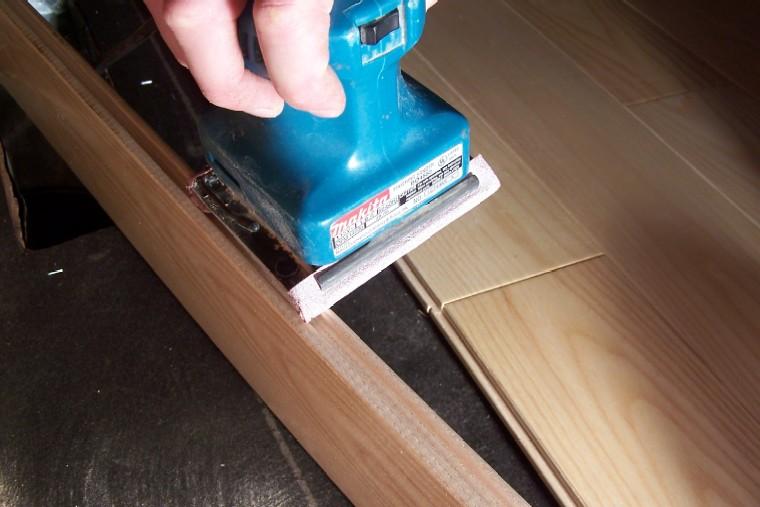 at sanding a level face over, say 12" at that depth. Other wise I will pass it through a table saw. I might do this differently if I had a rabbet or shoulder plane, of the Lie-Nielsen variety. O! How I wish I had a plane. I will have one by the time I get to laying the floor in the rest of the house. whish-whish.
 Here is a 5' board I had to 'shape' that had ~4' which needed 1/16" shaved off. That's 4-feet. There's no way I could evenly sand 1/16" off 4' (O! How I wish I had a plane). I just hadn't noticed that the preceding board (upper right) was that much narrower until after I installed it. Rather than rip it up and find another (I could spend half my time doing this), I chose to move on and deal with it. I chose a board of the wider variety (why are they not uniform???) and shaved off that difference on my table saw, then beveled the edge with the sander. It fits, is nearly imperceptible, and keeps the leading edge straight for the next row. I will have to hand coat these edges later with an aluminum-oxide finish.
 (3) A less desirable solution is to come back and fill the gap with wood putty. I will have to do this in a number of places. I will also have to find a way to seal it, probably with a tiny paint brush and a polyurethane finish. This is acceptable, because it is in the recessed seam and not directly walked upon. But it's still a visible "fix". (NOTE:I will have to do this because I missed it while installing intially) (4) Even more undesirable is to try to take up the difference by wedging something like a screwdriver into the subfloor and bend it into place. This is sometimes necessary, especially if the board is longitudinally warped (aka, crooked). But if doing this throws your leading edge out of line, you will be doing this evermore, and dealing with other repercussions, as well.
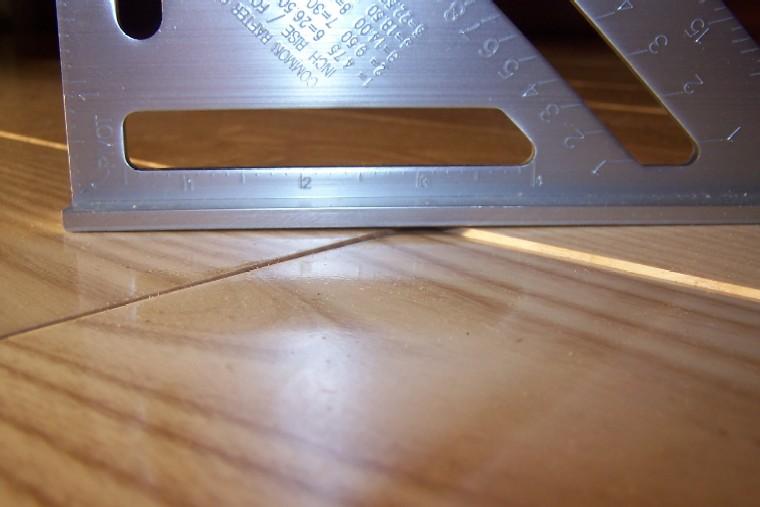 Another problem I've been encountering is a variation in the thicknesses of boards. Now this is relatively normal, which is why prefinished boards have beveled edges to make up for any differences in milling. To me, 1/32" difference in thickness is acceptable, but 1/16" is not. The solution: Don't intall a board that is that much thinner/thicker. It's not that you'd stub your toe, but you would definiately be aware of it, even see it. I do NOT recommend shimming or remilling the groove or bottom to level it out as you are inviting squeaks into your floor instantly. Just be mindful; you should notice it on the initial dry fitting, whereas it easier to overlook the width issue mentioned above. This is something that an unfinished floor benefits from as they are sanded down prior to finishing. But overall, this has been less common to confront from what we have seen.
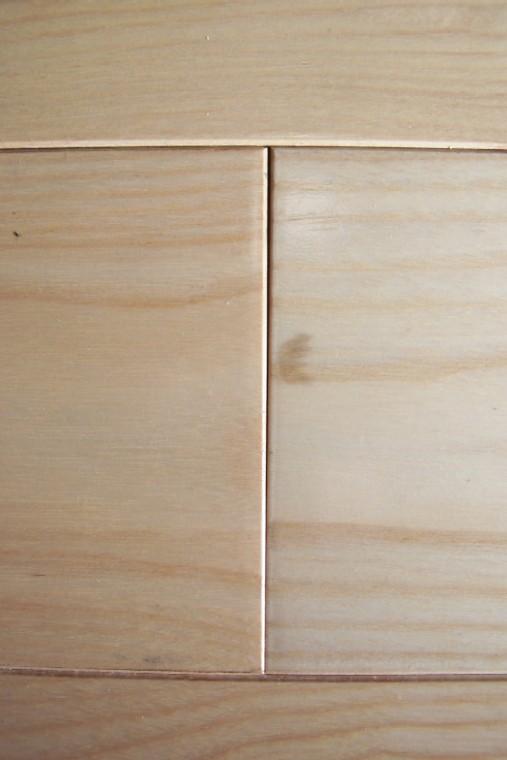 The last issue is one I deal with 90% of the boards I put down, one of unequal butts. I am rather disgruntled that the machine that mills the end tongue cannot do this parallel with the machine that mills the end groove. Both ends should be 90°, or if not that, then at least be parallel with each other.
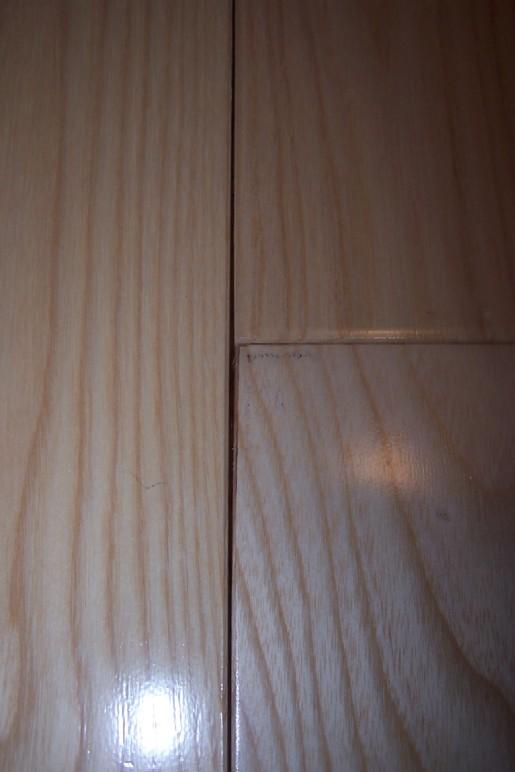
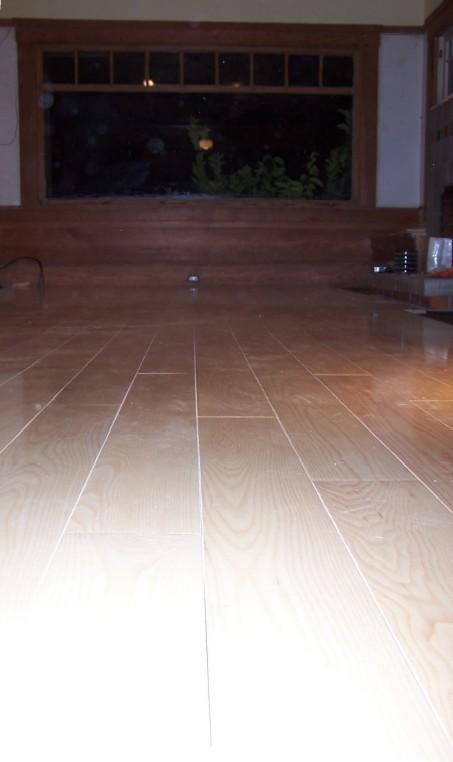 I know this is the case because the joint lines run straight through the two rooms and do not bend or curve away (taking great pains to ensure this). Why, therefore, am I left with up to 3/32" gaps at the bottom of the end joints? The one you see here is only 1/32" and will be sanded. For these lesser instances, I can just sand the groove-end down to match, but in the greater discrepancies, I have to angle the chop-saw .25-.75° to re-cut the groove end. And of course, I then re-chamfer the new edge with a sander. Feh!
Note: More pictures will follow soon, within another
day or so, some to be replaced. Need to retake some shots, so stay tuned.
Labels: flooring, hardwood, how-to, installation, troubleshooting
posted by Oblio70 @ 9:16 AM
3 comments
![]()
![]()


3 Comments:
As an interior designer, I don't install, but I do spec. So I always spec "select and better" which has less color variation and a more consistent figure to the wood. Has a higher price point, too. Here in Boston, that's what people put in pretty much across the board. I wonder if the grade makes a difference in the issues you are having or if you got a bad lot...have to call my flooring guy and ask.
AbbeyK
As I mentioned early on in my verbose footnote, we had purchased the "select" grade. The coloring and figure variations (minimal as they were) were right on. The problem we have been having has been with the milling of the wood. As I said, though, it is probably due to it being a quasi-"odd lot", meaning it may have contained a few boxes of odd-lot material (mis-milled). Half of the boxes were of the larger/older variety, while the other were more tightly packed with a note on top about the "new Bellawood Floor Cleaning Kit". It was all they had at the time, and we didn't want to wait for a back order. It seems Ash is popular only on the east coast, while darker woods like teak, mohagany and walnut are popular here in California (thank you Ethan Allen).
Those palm sanders are brutal to use. Ive had better luck and less stress from the vibrations with a mouse sander.
Post a Comment
<< Home